
The application of a low thickness layer of clear epoxy resin gives the surface an enhanced and glossy effect compared to common transparent lacquer finishes.
Unlike commonly used polished clear coats, the epoxy resin adds a glaze effect to many types of materials such as wood and even a surface painted with a specific finish. The application of this low thickness resin gives the visual sensation of moredepth.

Clear epoxy resin with glaze effect. Application of a low thickness layer on MDF and wood.
Clear epoxy resin, glaze effect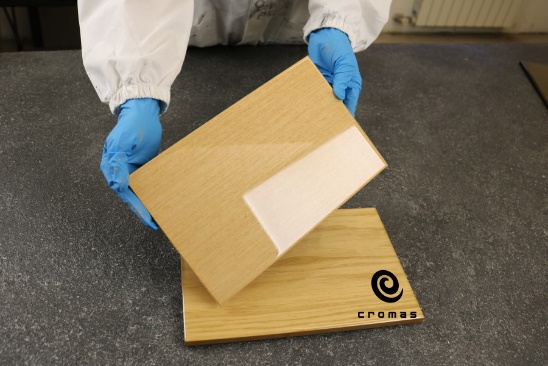
Crystal clear epoxy resin with glaze effect. Application of a low thickness layer on wood.
Clear epoxy resin with glaze effect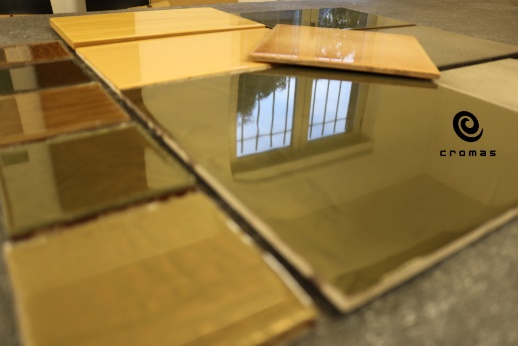
Low thickness clear epoxy resin with glaze effect.
Low thickness crystal clear epoxy resin with glaze effect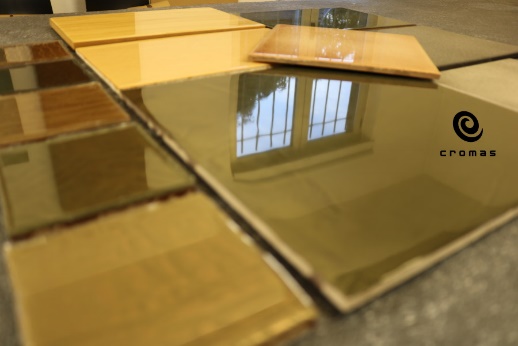
Low thickness clear epoxy resin with glaze effect.
Low thickness crystal clear epoxy resin with glaze effect.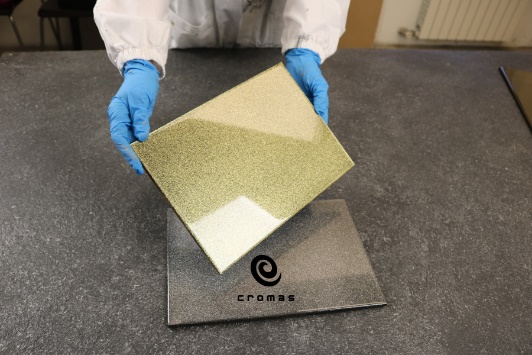
Low thickness crystal clear epoxy resin with glaze effect. Application of a low thickness layer over paint or wood.
Clear epoxy resin with glaze effect. Application of a low thickness layer over paint or wood.Once the resin is cured, the material shows low yellowing over time. We added UV filters to provide long-term protection and resistance to yellowing. This resin is suitable for interior use only.
With Cromas Paints scientific experience in producing special effect paints, we have developed our resins for professional applications. Many other resins are intended for a DIY customer.
The Cromas resins werescientifically developed to feature these professional characteristics:
- A Low Viscosity and isBalanced – the material is self-leveling at low thickness
- A high resistance to Carbonation – the reaction of the resin hardener with the air and humidity that can cause defects in the surface
- Resistant to UV rays and is Low Yellowing
- Calculated Mass Effect – the temperature rise of the curing resin – tested on common furniture surfaces
General and important information about resins application technique
Once the resin is fully hardened it becomes a unique glossy surface that is more durable and features a higher resistance than common lacquers even for a low thickness material. An application of 1 to 2 mm in thickness can be poured over flat and level surfaces without the need of a frame or mold.
For a little higher thickness application of this resin, it is necessary to create a simple frame with adhesive paper or tape. At the time of pouring, and after the resin has become fully balanced or self-leveled, any extra resin will fall off the edges.
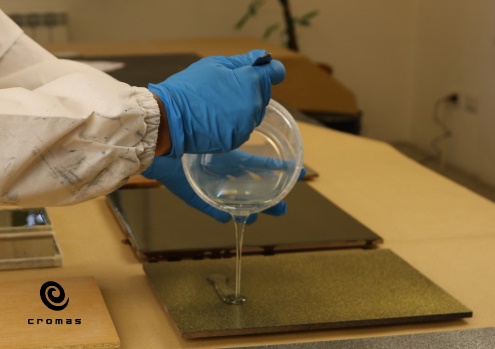
How to pour low thickness epoxy resin over painted surface or wood
How to pour low thickness epoxy resin over painted surface or wood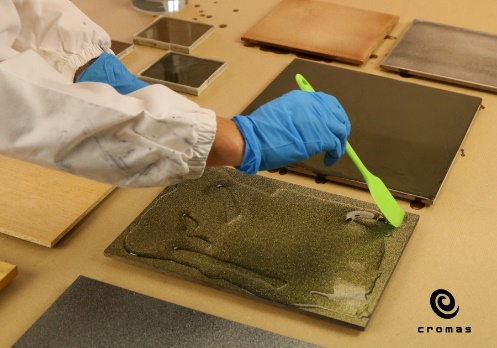
How to spread low thickness epoxy resin over painted surface or wood
How to spread low thickness epoxy resin over painted surface or wood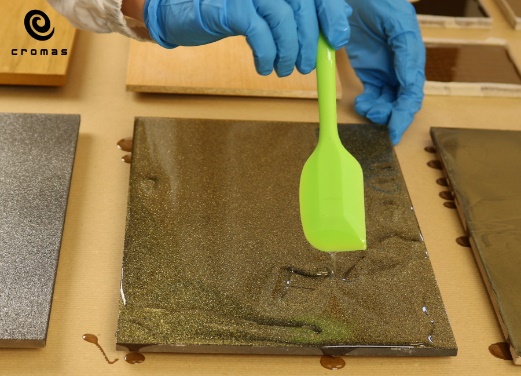
How to spread low thickness epoxy resin over painted surface or wood
How to spread low thickness epoxy resin over painted surface or wood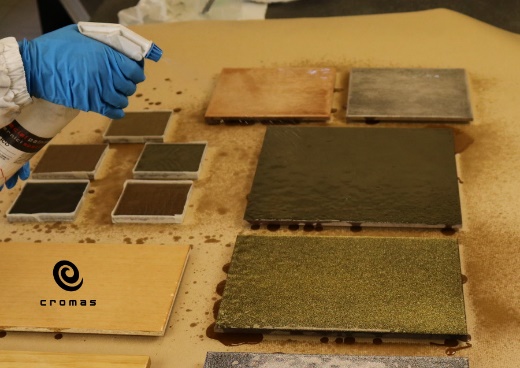
How to remove air bubbles from low thickness epoxy resin with denatured alcohol
How to remove bubbles from low thickness epoxy resin with isoproply alcoholAfter the low thickness resin has fully hardened, it can be polished just like any common lacquered acrylic, polyurethane or polyester material. When polishing, it is important not to heat the resin surface too much with the polishing machine. An excessive amount of heat from polishing can lead to a temporary softening of the suface, and making it harder to polish.
For applications on untreatedwood with open pores, it is necessary to seal or insulate the material first. As an alternative to common insulating products, brush or spray 1 or 2 layers of epoxy resin or sealer to achieve excellent results. To apply the resin, it is recommended to add paint thinner such as Cromas Paints SV146 to prepare for brushing or spraying.
This type of resins was developed for pouring on flat and level surfaces. It is also suitable for standalone casting projects. This product is also called a Balanced or self-leveling resin. It is important that the surfaces to be treated is flat and level to control the pouring as the thickness rises.
This resin has been studied for low thickness applications, with cure times of 24-48 hours at a temperature of 20-25°C. When working with this thickness the temperature rise of the resin is moderate.
Applications between 5 mm to 10 mm in thickness can be made on a surface that is not too large with total resin mass below 2 kg. For larger surfaces with a higher thickness, it is suggested to use the medium thickness resin.
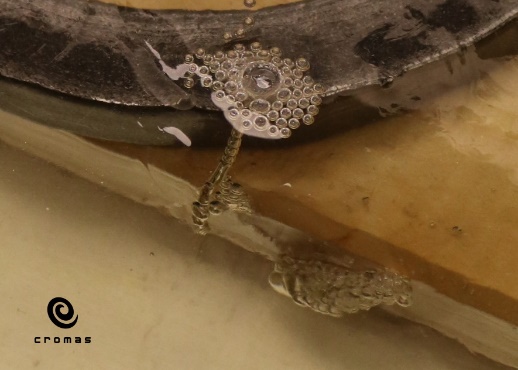
Air bubbles from non sealed epoxy resins surfaces
Air bubbles from non insulated epoxy resins surfaces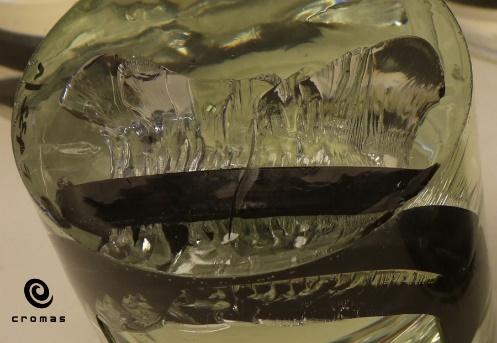
Mass Effect example, excessive heat reaction caused by use of incorrect resin for purpose
Mass Effect example, excessive heat reaction caused by use of incorrect resin for purposeIn winter, the application process of the resins must be carried out in a warm work environment. The recommended temperature during the curing or hardening time is at least 20° C. At lower temperatures, the curing time increases and some imperfections may appear on the surface. The recommended temperature during working time is 25°C and the temperature should remain the same during the hardening time. It is advised not to store the resin in a cold area during winter.
It is also suggested that the surface material, the encased items, and the working environment not be too humid. This is because too much moisture in the air or in the encased items can react with the mixture and cause defects. In order to assure the resin has good resistance to Carbonation, it is important that the working environment and items to be encased are moisture free.
The importance of the execution of pre production testing
The application process of casting, self-leveling, or encasing objects in epoxy resins is not difficult, but our experience tells us that it is necessary to proceed with testing, to develop your standardized application process especially if there is no previous experience in resins. Cromas Paints goal is to give you the most useful information so your projects are successful. The provided information comes from our direct experience. Because there are many factors to consider, we always advise to proceed with product testing in a controlled working environment and using the same materials.
This page is under construction, more updates and photos about the application process will be uploaded soon.
Do you want to learn more?
- Tips and Tricks about how to apply a low thickness epoxy resin
- About the Mass Effect of epoxy resin
- Polishing of epoxy resins
- A guide to choose the most suitable epoxy resin for the project
Related products
-
![front image - Phosphorescent Epoxy Resin]()
Phosphorescent Epoxy Resin
![back image - Phosphorescent Epoxy Resin]()
Phosphorescent Epoxy Resin
-
![front image - Epoxy resin for three-dimensional decorations]()
Epoxy resin for three-dimensional decorations
![back image - Epoxy resin for three-dimensional decorations]()
Epoxy resin for three-dimensional decorations
-
![front image - Transparent coloured epoxy resins]()
Transparent coloured epoxy resins
![back image - Transparent coloured epoxy resins]()
Transparent coloured epoxy resins
-
![front image - Pure Metal metallic epoxy resins]()
Pure Metal metallic epoxy resins
![back image - Pure Metal metallic epoxy resins]()
Pure Metal metallic epoxy resins
-
![front image - Medium thickness casting epoxy resins (up to 3 cm) and small encapsulations]()
Medium thickness casting epoxy resins (up to 3 cm) and small encapsulations
![back image - Medium thickness casting epoxy resins (up to 3 cm) and small encapsulations]()
Medium thickness casting epoxy resins (up to 3 cm) and small encapsulations


